Hanging Insulation
What may seem ordinary to most has actually filled our family with excitement. We’ve made good progress on insulating our cabin home. We estimate that we’ve done about 40% so far. That was as of Sunday evening. I know that we are moving at a snail’s pace from the outside, but actually we are moving along pretty well, all things considered.
Prep Work
Before doing any of the interior insulation, last week, the boys and I sprayed the entire inside of the exterior walls. We used BoroCare with Mold Control solution as a termite preventive and as a precaution against mold on the wood. This was messy, not fun kind of work, but we did it! The only room we have to spray is ours, because that room was stuffed to the ceiling with insulation.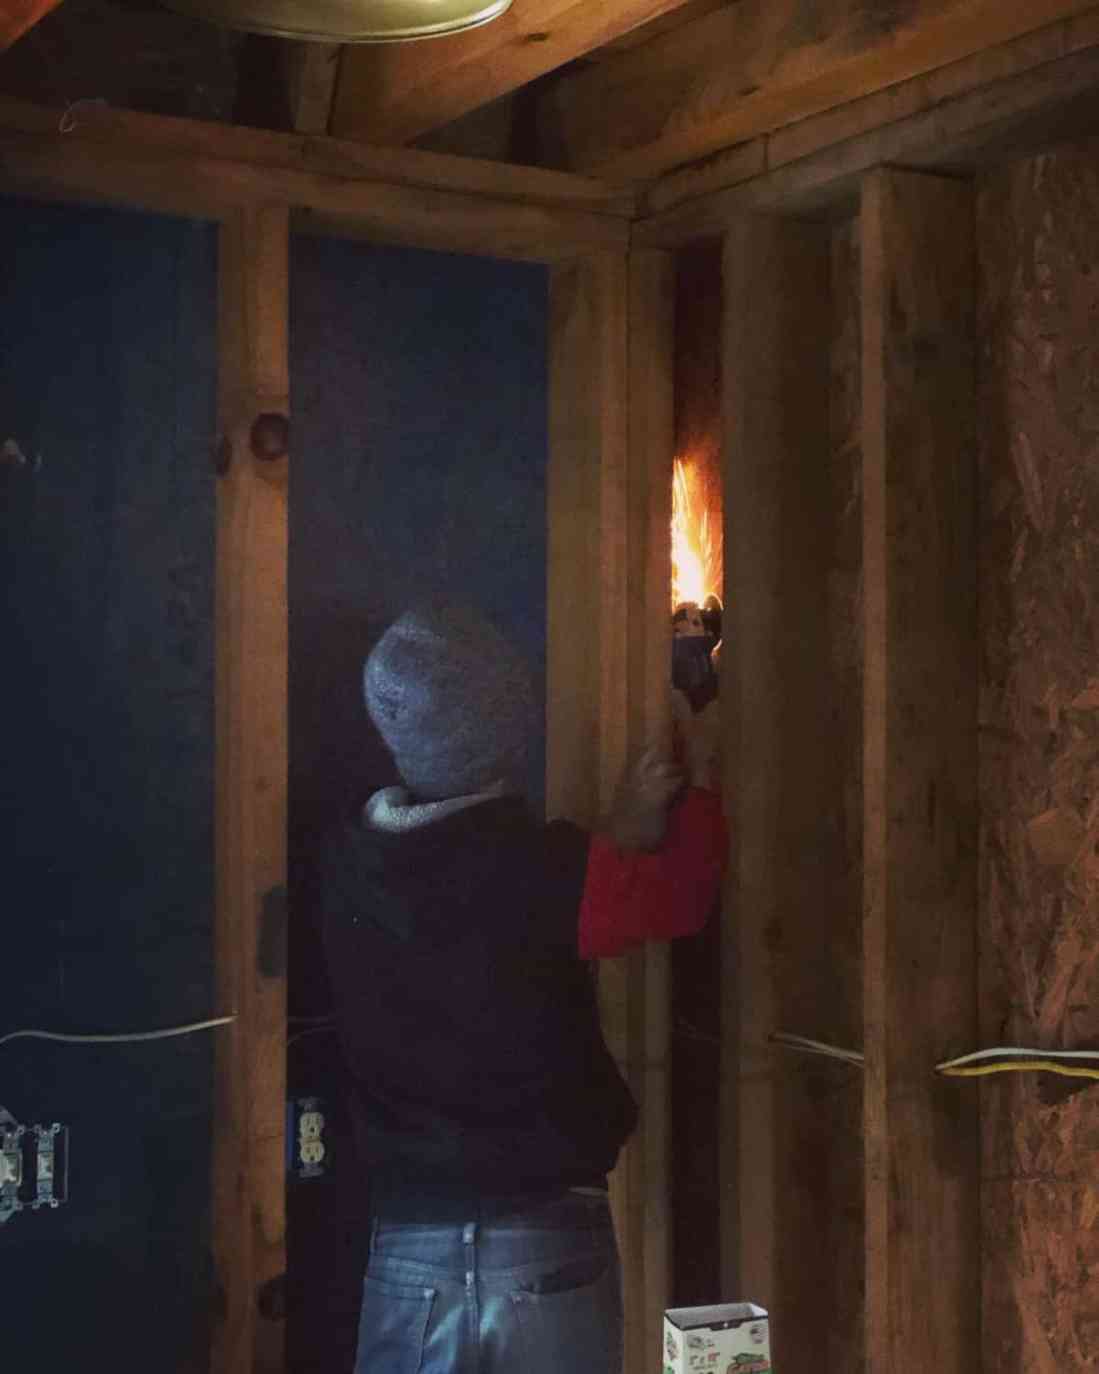
Choosing insulation
Greg agonized for many months over which insulation we’d use. We’d already prepared the outside of the cabin with several layers of rigid foam insulation under the outer boards. The roof has four inches of foam board, so we did have a good start. Greg is adament about a super insulated home. (See my post from a couple years ago about our roof)
With all that foam board, the house was not just a cold shell, but did hold some heat. We just needed the rest.
Greg really wanted to do the sprayed in foam insulation by a professional. He felt like this would be best. It seals in every crack, and coats the entire interior with a very effective layer of insulation. It’s expensive, but we still considered it.
Our problem is/was that we are storing our household belongings inside the home while building. Not ideal, but it’s just what we had to do. This means that we are working around it, and have boxes stacked to the ceiling in the basement. We are also curing lumber for the floors inside, so we don’t exactly have an empty house to work with. Yes, we could move it again, but we are trying to minimize all the extra work.

We finally had an insulation professional come out to give us an estimate. He helped us to decide. He didn’t think he could easily reach our very tall cathedral ceilings in the living area, and he was concerned also about working around everything. It was mainly the ceilings that made him shy away from recommending spray foam.
That means we are doing the Pink Panther insulation, or fiberglass batting. For me, I breathed out a sigh of relief, because we can install this on our own, at our pace. However, this also means a lot of work! What’s new there?
Insulating the walls and ceilings
We are installing R19 in the walls, and R30 in the ceilings. Because of our gambrel roof, all of the upstairs loft area have walls that are part of the ceiling, so we will not have a cold, drafty loft!
These boys have been impressive.
Once again I live a terrified existence that will relax once Adam gets down from all of these tall ladders!
Here are some of the items that we’ve found useful, and some we have not liked. Maybe it will help someone.

- Sprayer. We found that the Roundup brand works well. You need the pump up kind. One gallon size was good for those on ladders.
- Eye goggles, gloves, for spraying the chemical
- Insulation cutters. — see below.
- Utility knife with razor blades. See below for recommendations
- Tape measures
- Scissors
- Staple gun. Electric and manual. One for every person. I have a way easier time with the electric staple gun, because I can’t squeeze the manual one that well. However, a corded tool just won’t work everywhere, so the manual ones are less complicated in that way. We used both.
- Staples. Tons of these.
- Straight edge for cutting. A long board works well
- Insulation. Obviously. 😉 You want the faced kind, and you can order bundles from Lowe’s or Home Depot. We had this delivered and saved ourselves all kinds of hassle.
- Crack filler. Regular and Big Gap Filler. Shoot this expanding foam into any opening that’s not sealed up tight, and soon it will be!
About the insulation knives.
We tried several types of insulation knives.
- Lenox Insulation Knife
 Let me just say–this one is made for insulation, but it is terrible. If we’d have read reviews before picking it up at the local Lowes, we’d have skipped it and not wasted our money. Doesn’t cut worth a flip. I even tried sharpening the blade with my Rada sharpener, but we just didn’t like this knife.
 - Snap-Off insulation/Utility Knife. This one, with replaceable blades worked pretty well. I like that you can extend the knife way out to slice through thick R30 insulation. When it gets dull, snap off to a sharp blade, so that works pretty well. Also–the blade is skinny, so you can cut right up to your straight edge and not have the thick handle in the way.

- Kobalt utility knife This little knife worked really well! It’s slim, and we found that that helped a lot! You can get right up to the edge of the straight edge to measure accurately.

- Kobalt Box Cutter Utility Knife. I have this knife. It worked well for cutting compressed insulation–just keep a sharp blade on. It’s not my favorite for insulation, but it does work very well.

Obviously, we could not try every type of knife, and Amazon has several different types that may have worked better, like this one, and this one. Interesting that they are both serrated, and the knives we tried are smooth.
My personal opinion (not that you asked) is that the knives with the changeable blades are some of the best, but if we ever do another house (and I pray we never will) we can try the serrated knives. 😉
Always complicated–that’s us!
Whatever we try, we manage to pick the hardest way. 🤷♀️. This time–it’s our ceiling.
Let me tell you–hanging insulation up there is scary, and I mean that’s from my perspective looking up at our son on the ladder. He’s careful, but not, and I’m doing way more praying til we are finished. 
Now, we’ve had several days under our belts, and we just have the loft ceilings, and the peak of the great room left. I keep wondering how in the world we will hang the wood on those high ceilings. I may have to spend some days at the funny farm til that gets finished, or my hair will turn completely white. Greg assured me “it’s no big deal” but I don’t actually see him up on that ladder. 🤔
Anyway…
That’s the latest update!
If you look at our house–all the messy, ugly spaces are mine. All the razor-cut, perfect rows belong to the guys. I’m just not that great at this, but I am good at carrying supplies, and helping. I did plenty, but not as much as the boys.
Actually–Greg went around using crack filler and stopped every draft before we hung the pink stuff. This has made a huge difference, and we aren’t even finished! It’s quieter, warmer, and we’ve stopped the flies from coming in. 🪰
Stay tuned!
We are making progress on the cabin!
I know I have not been regular with updates, but you can catch up on past projects by checking out the Home Built Cabin
Feel free to follow Ridge Haven Homestead on Facebook and Instagram, because I tend to post quick updates over there! But be sure to also follow here, so you don’t miss when we finally get into our house!

Until next time!
